FX9 Arctic Adventure
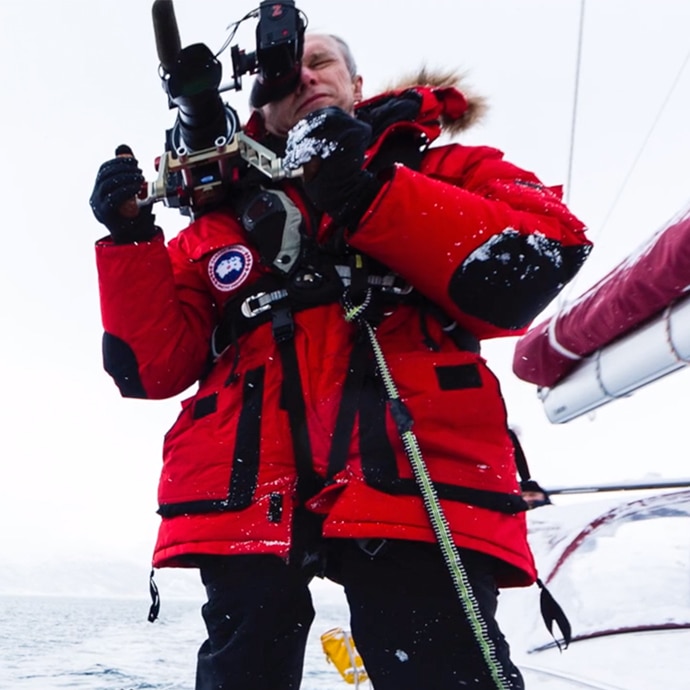
Alister Chapman shooting with FX9’s S-Log3 mode in northern Norway
Every winter I run a small photo and video tour to the north of Norway in search of adventure and Northern Lights. A big part of these trips is to experience real arctic conditions and this year was no exception as we encountered temperatures as low as -38c.
To get to our accommodation, high on the arctic plateaux known as the “Finnmarksvidda” we have to travel by snowmobile across frozen lakes. On at least one day we go on a dog sledding expedition across the desolate snow and ice.
I don’t know of any other video camera that would have produced the results the FX9 did.
In order to document the trip and to shoot the Northern Lights I have always taken several cameras. Typically, a very sensitive low light stills camera such as a Sony A7S to shoot the Aurora plus a video camera to shoot our daytime activities out and about on the snowmobiles. Then sometimes a digital cinema camera too. These means carrying a lot of kit, something that’s not easy on a snowmobile.
This year I cut my kit right back to the essentials taking just my Sony PXW-FX9 and an A7S body. Because both cameras are E-mount I only needed to take one set of lenses. The one lens I used the most was the Sony 24-240mm FE as it provides a very big zoom range when out and about on the snowmobiles.

Golden hour
One of the great things about northern Scandinavia in January is that when the sun does make its somewhat brief appearance each day it skims along the horizon. This means you get amazing “golden hour” light all day. Shooting the sunrise and sunset is challenging due to the huge dynamic range and many other situations such as shooting against bright snow can be challenging. So, for this shoot I decided to shoot primarily using the FX9’s Cine EI mode and S-Log3/SGamut3.cine.
Shooting S-Log3 on the FX9 is pretty straight forward. Because the camera has a relatively low noise level at either of the two base ISO’s of 800 or 4000 ISO you don’t need to worry about having to add any exposure offsets. When shooting UHD you can use the camera’s built in MLUT’s (Monitor Look Up Tables) to apply a LUT to the viewfinder so that you see a normal looking image rather than a flat one. When shooting in HD, perhaps when shooting at frame rates greater than 60fps, you can turn on the camera’s Viewfinder Display Gamma Assist function which gives you a standard Rec-709 image in the viewfinder, again making exposure assessment easy.

Even though I was going to be primarily shooting in UHD, I decided to use the Gamma Assist function rather than a LUT as this would allow me to have the same Rec-709 type image in the viewfinder no matter what mode or frame rate I chose, including HD at 120fps and also when playing back clips. In addition, when using Gamma Assist the camera’s waveform display shows the S-Log3 recording levels and I find this very useful as I can view a Rec-709 image but measure the actual S-Log3 recording at the same time. A great built in feature of the FX9 is the interval record function that allows you to shoot time-lapse sequences quickly and easily. This was how I shot the sunrise and sunset sequences seen in the video. The built-in variable ND filter is also very helpful when shooting these kinds of sequences.

Exceptional sensitivity
The Aurora displays weren’t very bright on this trip, but fortunately the FX9 is exceptionally sensitive. By combining the interval record function and the high base ISO sensitivity setting with the camera’s slow shutter I was able to get some great time-lapse sequences of Auroras that were barely visible to the naked eye. For the Aurora, rather than S-Log3 and Cine EI I chose to use S-Cinetone as this allowed me to see the final colours, brightness and noise while shooting, making the whole process of capturing the Northern Lights very simple. I don’t know of any other video camera that would have produced the results the FX9 did.
When I shot in the workshops at the dog sledding centre, the high base ISO setting was a huge help as the lights were very dim and I didn’t want to spoil the atmosphere of the workshop by adding extra lighting. The lights were also a very strange colour temperature and being able to now dial in an exact white balance, as well as a tint offset, when using the Cine EI mode was a huge help.
Back outside again and on the day of the dog sledding it was particularly cold. In these conditions, when shooting run and gun, racing ahead of the dog sleds on the snowmobiles, jumping off to quickly shoot, having a great autofocus system is wonderful as you can keep your gloves on and allow the autofocus to track the moving dog sled teams.
For me the FX9 really made shooting this trip very easy and I’m really pleased with the way the material looks. I now feel I only need to take one camera for my Northern Lights trips and that means I will have a bit more space for things like a compact slider.
Note: Sony’s recommended operating temperature for PXW-FX9 is 0-40C. Alister is an expert in extreme weather shooting and used insulated covers to protect his FX9.


