4 Seasons In A Day And A Red Hot Volcano
Alister Chapman shoots with FX6, FX3 and Xperia PRO
For a very long time I have wanted to shoot an erupting volcano , so when a new volcanic fissure appeared at Fagradalsfjall in Iceland, it got my attention. Within a few days, a classic looking volcanic cone began to form and brilliant eruptions of bright orange lava started spewing into the sky.
While the Fagradalsfjall volcano is in a reasonably accessible area, I’d still need to approach on foot. It was a 2.8km hike (each way) that climbs over 250m. I decided to take two camera kits. I wanted to use my FX6 as much as possible, but I also wanted an even lighter kit as a backup. So, I also took my FX3.
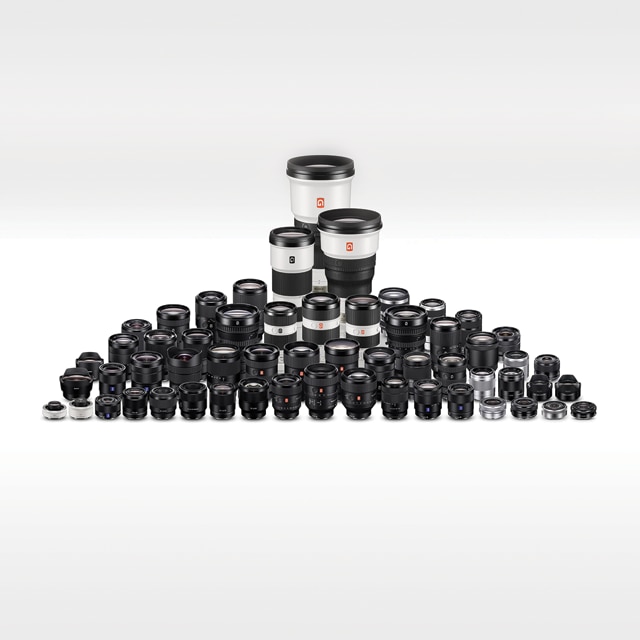
The main lens I would use was Sony’s 24-240mm G series zoom. Although not a particularly fast lens, the very wide zoom range allows me to capture a very broad range of shots with a single lens. Optically I find this lens to be surprisingly good for what it is – it’s a bit of a hidden gem. Then to get close-up shots I included the Sony 200-600mm G series lens. This is a great lens. It doesn’t extend when you zoom in and out as many similar lenses do. This makes it much easier to balance when shooting on a tripod. It’s also very sharp and the auto focus works brilliantly. In addition, I packed an Atomos Ninja V+ so I could shoot RAW and a Sony Xperia PRO 5G phone -as this can be used as a very lightweight but high quality monitor via its built in HDMI input.

Spring departure
When I left London it was a beautiful spring day, but I landed at Keflavik airport in the middle of a sleet and rain storm. But never mind I thought, it’s Iceland, the weather will soon change. And it did.
For the first trip I chose to take the FX6, both lenses, the Ninja V+, Xperia PRO and a lightweight tripod. My backpack weighed around 15kg with the camera kit, hiking poles, spare clothing and food.
The start of the hike was easy, a decent path across flat terrain and the sun shining warmly. By the time I reached the top, a cold wind was howling bringing with it thunderstorms, rain, hail and sleet. A lot of this weather is created by the volcano itself.
My first view of the volcano came at the top of a second climb. Off in the distance, about one kilometre away I could see huge fountains of lava pouring out of the cone of the volcano. Nearby was the edge of a vast lava field with glowing pockets of molten rock. While I was keen to get closer to the volcano, I decided to shoot some footage at the edge of the lava field, before making the two more climbs necessary to get closer.
After getting some footage of the lava field I moved on. Two more hills to climb. But it was worth it. I was now around 300m from the volcano and had a great view of the eruptions.
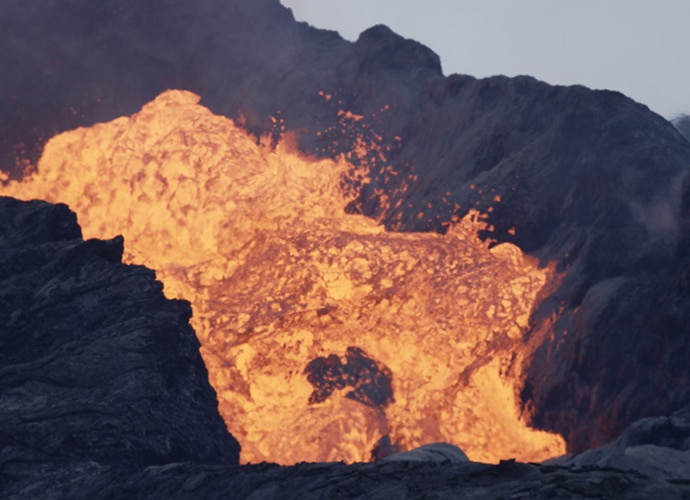
Every ten minutes a vast wave of lava would rush down the slopes of the volcano disappearing into lava tubes under the dark crust of the lava fields. This was then followed by two or three minutes of fountains of lava bursting from the crater. I could feel the intense heat on my face. At the same time the weather continued to blast me with strong icy winds, rain and hail. Thank goodness for the image stabilisation built into the lenses I was using!

Using the Xperia PRO as a monitor with the FX6.
1000 degrees C
I was shooting in 4K using S-Log3 to the FX6’s internal cards or raw to the Ninja V+. I used the FX6’s Cine-EI mode shooting at 800EI while using the default s709 LUT for monitoring. When using this LUT I like to expose landscapes so that the image in the viewfinder is nice and bright, but I don’t deliberately overexpose. I used the built in waveform display to keep an eye on my exposure levels, measuring the s709 LUT and placing the bright lava flows around 70 to 80%. I shot at 23.98fps, 60fps and 120fps. In the resulting footage very often the normal speed video looks like slow motion due the large scale of the volcano. The crater was around 250m across and the lava is 1000 degrees C – I could feel the heat on my face. Many of the blobs of lava you see flying through the air in the video were the size of small cars.
Once I had filmed a few eruptions from this location I decided to hike all the way around one of the lava fields to get a different view.
Every time it rained vast plumes of steam would rise up from the lava fields giving it a very other worldly atmosphere. I did a few Facebook live streams from this spot using the Xperia PRO. To power both the camera, recorder and as well as charge the Xperia I used a couple of external batteries.

FX3 for day two
The next day I was up early as at that time of year Iceland has almost 24 hours of daylight. Still aching, I decided to reduce the weight I had been carrying by taking the FX3 rather than the FX6. Once again, the weather was far from ideal, but the volcano was still putting on a great show. Again, I shot at 23.98fps, 60fps and 120fps using S-Log3. To make monitoring easier I was using the camera’s built in viewfinder gamma assist function which provides a normal rec-709 type image on the FX3’s LCD screen. The matching colour science, very similar codecs and the use of the same media types makes using the FX3 and FX6 on the same project together very simple.
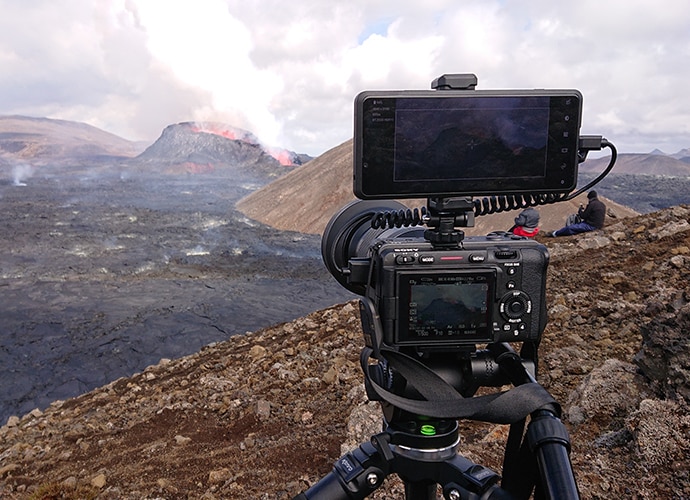
There are differences, however. You have to include ND filters in your kit when shooting with the FX3, it doesn’t have the very convenient internal variable ND filter included in the FX6 and there is no waveform display, only a histogram. But the image quality is almost identical. When I was shooting with the FX3 the Xperia PRO phone came in very handy as a monitor. The larger screen and wonderful pinch to zoom function made exposure and focus assessment much easier, plus there’s not many 4K monitors as slim and light as a phone!
But it was really on my last day where the Xperia PRO really came into its own. By day three everything hurt. But I still wanted to get some drone footage as on the previous days it had been too windy to fly. So, on the third day I decided to only take my small drone up to the volcano. But when I got up to the lava fields, I found that there were rivers of fresh lava flowing right along the edge. Something I hadn’t seen or filmed before and I didn’t have the FX3 or FX6 with me.
But I did have the Xperia PRO and it has 3 pretty decent cameras with lenses that give the equivalent fields of view to 16mm, 24mm and 70mm full frame lenses. These cameras can be used with the phone’s Cinema Pro app which gives you full manual control along with a look that mimics the way a Sony VENICE camera looks and is very similar an FX3 and FX6 when you use the Sony s709 LUT. It doesn’t replace a camera like the FX3 or FX6, but it certainly complements them very well. The footage of the flowing lava that I shot with the phone looks pretty good.
By the end of my trip to Iceland I had walked close to 25 km and shot a couple of hours of volcano footage. Despite the at times dire weather all my equipment had performed flawlessly. My timing had also been near perfect – just a few days later a lava field overflowed, cutting off the hiking routes I’d used.

Ideal kit?
If I was to do it again – would I change anything? Well, I did go back a second time and I took almost exactly the same kit. The FX3 produces excellent images, it is very capable and using the Xperia PRO as a monitor allows you to put together a very light rig, great for remote shoots where being light weight is paramount. But my favourite for this particular type of shoot remains the FX6. It’s a great camera for this type of remote location shoot and it remains my first choice. It is heavier and bulkier than the FX3, but the built in ND filters, the better LCD screen, LUT’s and ergonomics better suited to filming from a tripod make the FX6 the camera I would prefer to take when I can.
If you’d like to know more about this shoot, why not read my article How to shoot professional HDR video.


