How to shoot professional HDR video
What is HDR?
HDR or “High Dynamic Range” is primarily an increase in the brightness range that a monitor or TV can display. Until recently most TV’s and monitors could not show a very large brightness range, typically around 6 stops. New display technologies such as OLED (Organic Light Emitting Diode) and advancements in LCD back light technology have made it possible to produce screens that can show 10 or more stops of dynamic range. These screens are not just brighter, they also have better contrast in the darker parts of the image.
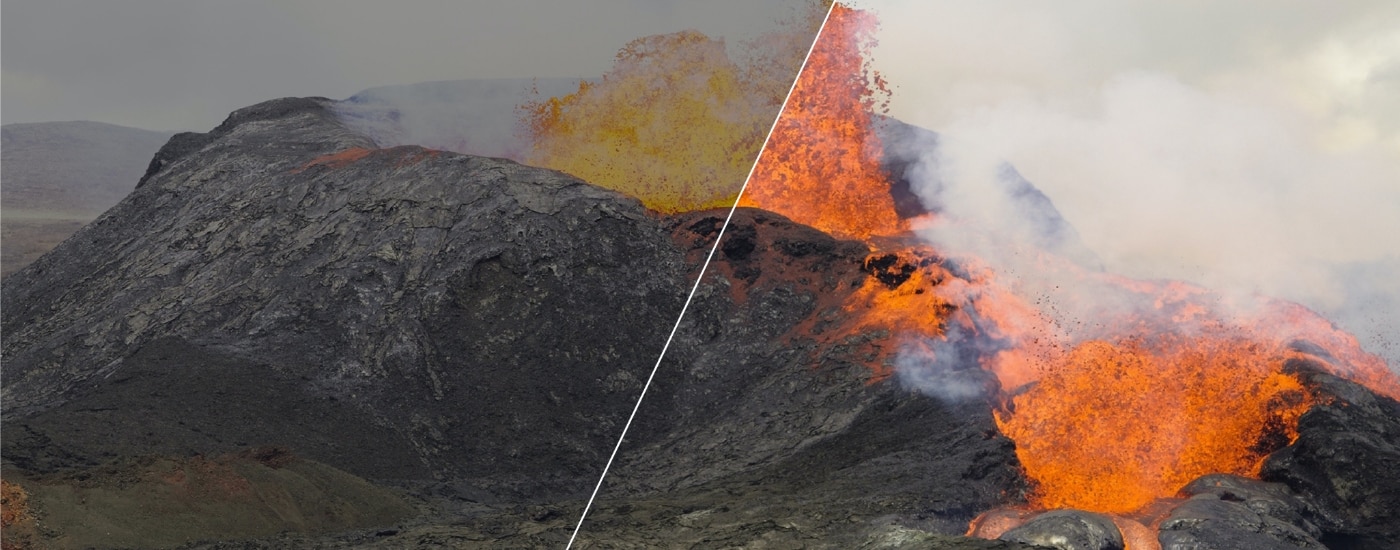
The images above are a simulation the difference you might see between an SDR image (left) and HDR Image (right) when you have an HDR TV or monitor. The wider dynamic range and wider colour range of the HDR display will allow a greater highlight range and a greater range of colours to be displayed.
To view this clip in highest quality 4K HDR, please visit here. If the YouTube player detects a compliant device, it will display a red HDR icon as an option. HDR is now standard on most flagship mobile phones and TVs, with support growing by the day.
How do you shoot HDR?
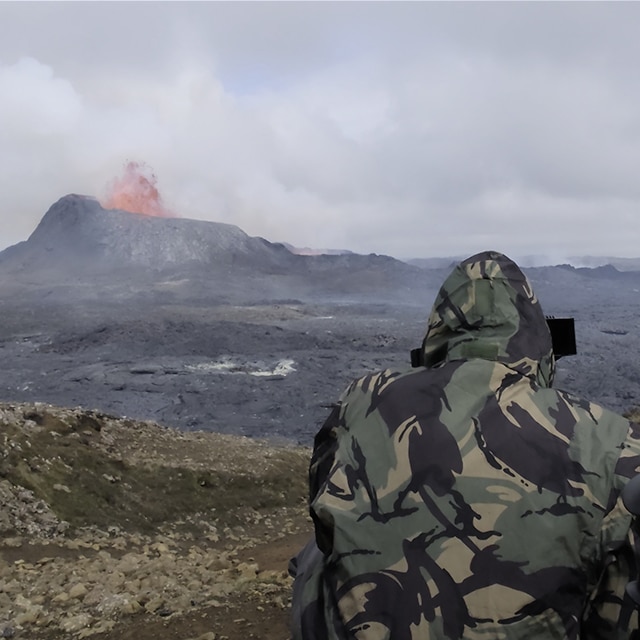
Many of us have been shooting using HDR ready formats such as Log or Raw for many years. To capture content suitable for HDR you need to record with using a format with a very large dynamic range. When I shot the Fagradalsfjall volcano in Iceland I shot using a mix of Sony’s S-Log3 and ProRes Raw using my Sony FX6 and FX3 cameras. When you shoot with S-Log3 or raw with these cameras you are capturing a very large dynamic range, perhaps over 14 stops. This is more than even the best current HDR TV’s and monitors can show and these formats allow you to manipulate the image in post production via the grading process to produce great looking HDR content. Many of Sony’s camera also include a dedicated HDR mode and in this mode the cameras use a gamma called “HLG”. HLG is one of the display gammas use in HDR TV’s and content shot using HLG does not need to be graded, it is already HDR straight from the camera and will be seen in HDR on a suitable HDR TV.

Do you need to expose differently for HDR?
When filming for HDR there is no need to expose any differently to the way you would for SDR (standard dynamic range). I think many people believe that for HDR you need to expose brighter but this is not normally true. You must remember that HDR is High Dynamic Range. It is about the range that you capture, not just the brightness. Faces, people, plants, buildings are not meant to be brighter in HDR than in SDR, they should be the same and should be exposed the same. But an HDR TV can show highlights such as reflections off shiny surfaces, or a very bright sky and at the same time details and textures in the deep shadows that are normally lost on an SDR screen. So, the key is to expose the mid-range correctly and then the highlights and deep shadows should just fall into place.
Filming the volcano proved to be quite tough as the ground was very dark, almost black and the flowing molten lava very bright. There was very little in the middle to use to assess exposure as you would do normally. So, I made extensive use of the FX6’s built in LUT’s and the s709 LUT to visually find a good balance between the dark solid lava and the brilliantly bright molten lava. I also used the waveform monitor to measure my recording levels as this helps ensure that you are not exposed excessively dark or excessively bright.
In the images below the first image is the S-Log3 image captured by the camera. The second and third images simulate the difference between an SDR grade (second) and HDR grade (third) when viewed on an SDR and HDR monitor or TV. The mid-range of both graded images looks little different, but the HDR image has a greater highlight range and as a result the highlights in the HDR image will appear brighter on an HDR display.
How do you grade for HDR?
My preferred method for grading HDR is to use grading software that uses a colour managed workflow. A colour managed workflow allows you set the format that you captured your footage in and the format that you want to deliver your footage in. In many cases the software is able to read the metadata in the captured video file to understand what the capture format was. More and more now, the software will also detect the type of display you have. It can then perform the correct translation between how you shot it and how you will view it. Of course, to view your HDR output you will need an HDR monitor or an HDR TV, you can’t use an SDR TV or monitor if you really want to deliver good looking HDR content.
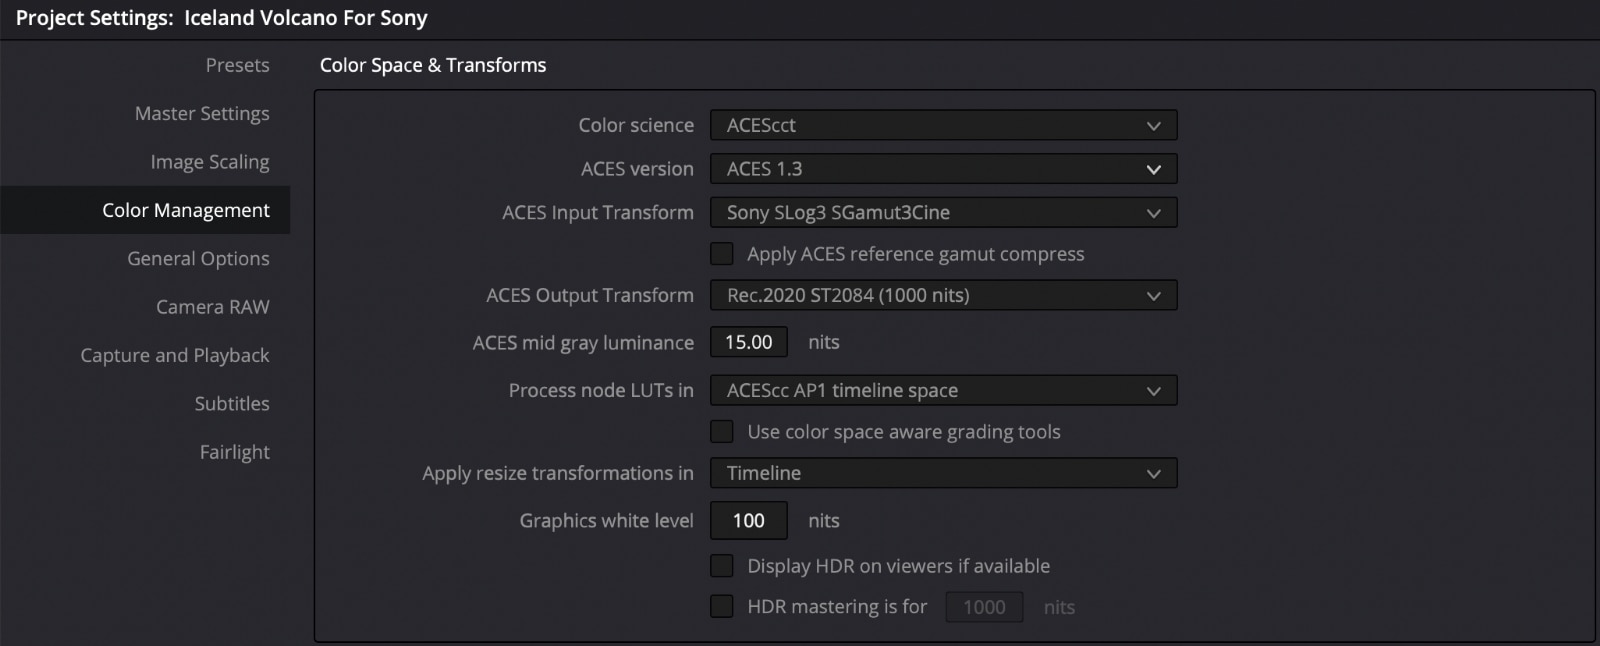
Image below: The colour management settings within DaVinci Resolve for an ACES S-Log3 to HDR workflow.
How important are colour managed workflows?
This type of workflow is going to become more and more important in the coming years as the need to deliver content for both SDR as well as HDR increases. I use DaVinci Resolve for my colour grading and the included ACES colour managed workflow. ACES is the “Academy of Motion pictures Color Encoding System”. It has been designed to provide a uniform colour managed workflow that can be included in many different edit and grading applications. Within Resolve and ACES using the colour management preferences, I tell ACES that I filmed with S-Log3 and that I want to deliver in HDR and the software performs all the necessary complex transformations between how the footage was shot and how it will be displayed in HDR. There is no need to use Look Up Tables (LUT’s) or any other tools, the software does all the hard work for you. I then grade the footage to fine tune the final look. If I then need an SDR version all I need to do is tell Resolve/ACES to output in SDR/Rec709 rather than HDR and then instead of an HDR output I will have an SDR output. Colour management tools are now incorporated into most of the better editing and colour grading systems, include Adobe Premiere and Final Cut Pro.
How do you deliver HDR content?
This is an area where we are seeing many changes right now. Go back four or five years and HDR displays were rare. Today they are appearing all over the place. Most premium phones now have HDR screens. HDR TV’s are now common and not significantly more expensive than similar quality SDR TV’s. Computers are catching up too and HDR displays are appearing on more and more laptops. But not everyone has an HDR screen and if you display HDR content on an SDR screen without doing anything it looks quite wrong. Fortunately, platforms such as YouTube now have the ability to convert a video uploaded in HDR to SDR so that when a viewer with an SDR display watches the clip it is played back in SDR. Those with HDR displays will see it in HDR. But, in order for this to work, YouTube etc. needs to know that the clips is HDR. This is done using metadata.
HDR Metadata
Metadata is “data about data” and there is a lot of metadata added to a video file when you encode it. One of the big benefits of using a colour managed workflow is that when you encode a file – within a colour managed workflow – the encoding software will normally add the correct metadata tags that will flag the file as HDR. Not only will the metadata flag the file as HDR but also the specific type of HDR with information on the target gamma and colourspace. When I use DaVinci Resolve to export a file from either ACES, or Resolve’s own colour managed workflow, the encoder by default automatically adds metadata tags that match the project’s target output settings. This way, when I upload the finished clip to YouTube, YouTube knows it is HDR and knows what type of display I viewed it on when I graded it. This information then allows YouTube to convert the file to other viewing standards – so no matter whether the viewer has an HDR display or an SDR display they will always see a correct looking image even though I only uploaded a single HDR file.
Codec choice for HDR
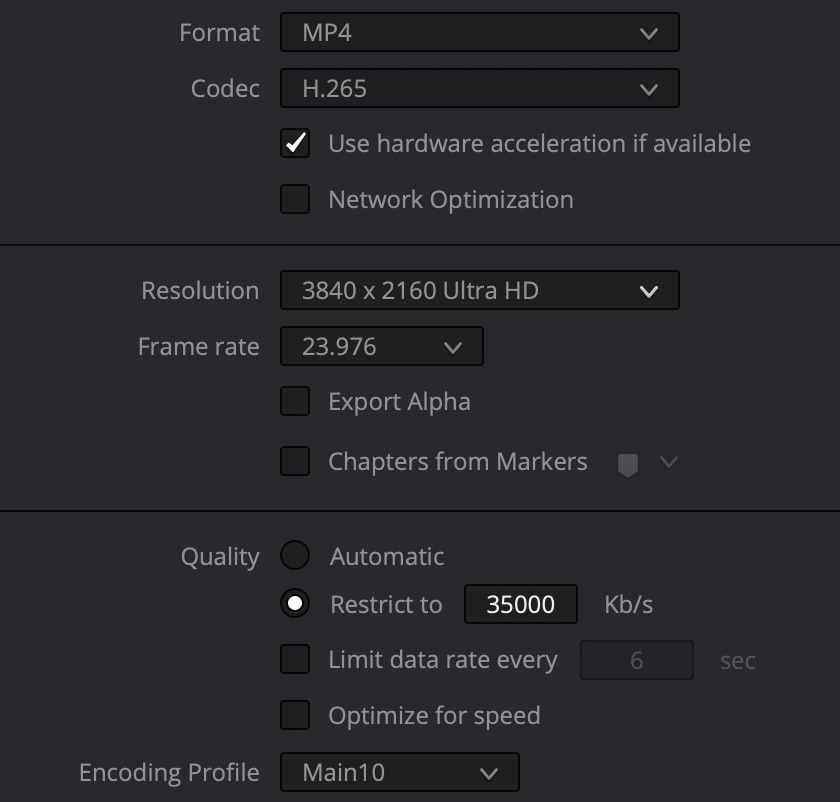
In addition to the metadata you also need to use a very high quality codec, preferably a 10 bit codec. This is because the greater dynamic range and increased contrast of an HDR image will show up any compression issues much more easily. One of the most commonly used codec for the distribution of HDR video clips is H.265. H.265 is 10 bit codec that uses very efficient compression to keep the file size very compact. Most HDR TV’s can directly play back H.265 encoded video clips from a USB stick plugged into the TV. YouTube, Vimeo etc all support H.265 and even at modest bit rates the quality remains very high. I encode my 4K H.265 files at 35Mb/s as this is the highest H.265 bit rate that many HDR TV’s support.
Please see image for encoding setting I used for the HDR volcano video.
HDR for today’s applications
HDR is here and it’s here to stay. In the future HDR will be normal and SDR will be a thing of the past. While this isn’t going to happen overnight, the need to deliver in HDR will continue to increase as more and more devices gain HDR screens and owners demand higher quality HDR content. At the same time, it is becoming much easier to shoot and deliver great looking HDR content. There are new things to learn for film makers, such as ensuring your content has the correct metadata, but once learnt, delivering in HDR is no more difficult than SDR. In HDR the video of the Fagrasdalsfjall volcano looks far closer to the way it looked to me when I was there than it does in SDR, so there is no doubt in my mind that this is how I would like people to see it.
If you’d like to know more about this shoot, why not read my 4 Seasons In A Day And A Red Hot Volcano article.


