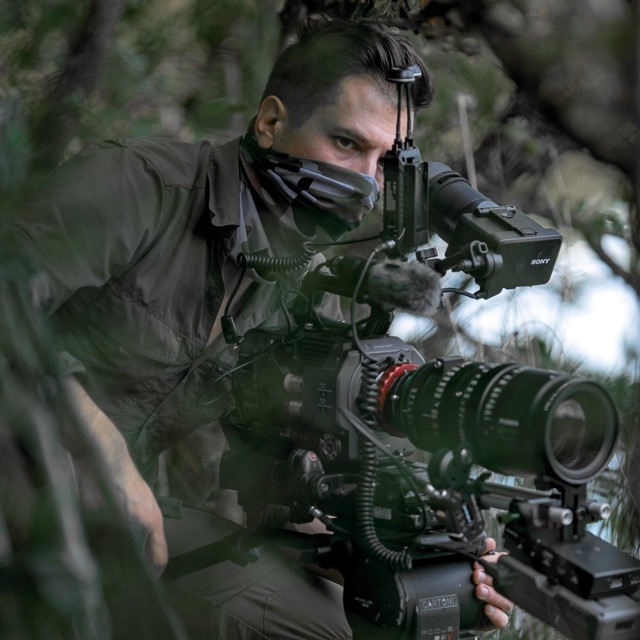
"The Wilderness Nearby" captured with FX6
Filmmaker James Glancy interviewed by Alister Chapman
Following the recent launch of the new FX6 compact full-frame handheld camcorder, I took some time to chat with wildlife filmmaker and presenter James Glancy, who used an FX6 to shoot his short film “The Wilderness Nearby.” I have also spent some time shooting with the FX6. I know it fairly well, but I wanted to learn more about the challenges he met shooting his film.
He told me that when shooting wildlife, it’s the unpredictability of the animal’s movements and behaviors that make it very difficult. You need to have a camera that is quick and easy to operate, and it helps to be highly mobile. So, having a lightweight but stable shooting kit is very important. The light weight of the FX6 allowed him to use a relatively light tripod without significantly sacrificing stability when using longer lenses. James mainly used Sony’s 24–70 mm and 70–200 mm GM lenses, and while most of the film was shot with a tripod, there are also many handheld shots.
James has many clients, including National Geographic and Discovery. But he also produces a lot of his own content about those that are working to help protect the natural world, something he is very passionate about. Usually these lower budget, quick-turnaround projects are better suited to conventional gamma curves such as the FX6’s S-Cinetone gamma. S-Cinetone is designed to create beautiful-looking video content with a film-like look. But for this shoot James wanted to create a very cinematic look. He wanted the viewer to “be able to put the TV on mute and enjoy the picture for the sake of the beauty of the shot.”
CineEI mode
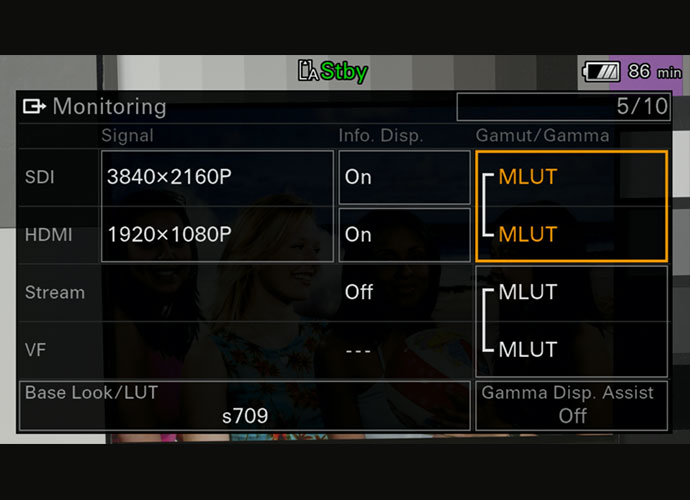
To achieve this cinematic look, James shot his film using the camera’s “CineEI” shooting mode. CineEI optimizes the camera so that it’s able to capture the widest possible dynamic. While recording using S-Log3 it allows you to add a LUT (look-up table) to the camera’s HDMI and SDI outputs as well as the viewfinder. By monitoring via a LUT that has normal color and contrast levels, instead of the flat and washed-out looking S-Log3, most people will find it much easier to quickly and accurately judge exposure levels.
James was quite candid as he admitted that some of his early shots were a little under exposed. But after a couple of days, and a little bit of experimentation, he was able to go out and shoot quickly and easily with the CineEI mode, confident his exposure would be good whatever the lighting conditions.


MLUT Benefits
Although he was very familiar with the use of a histogram display, common in many lower-cost cameras, James felt that the more detailed waveform display included in the FX6 allowed him to have a better sense of the balance between light and shadow in his shots. It made it easier for him to understand exactly which parts of the scene were at which exposure level.
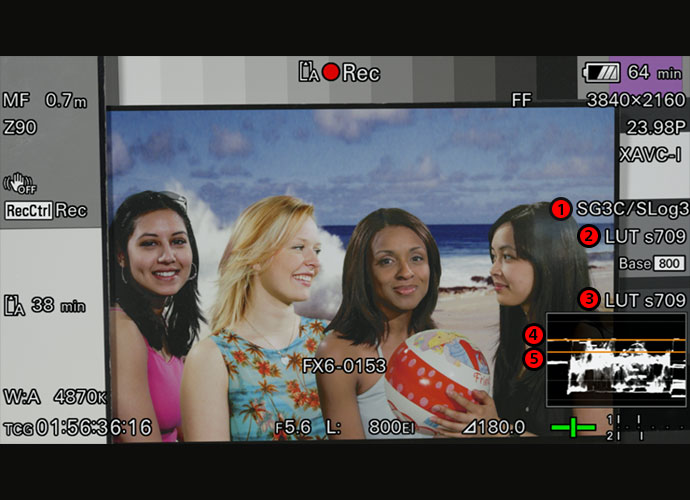
FX6 CineEI with default S709 Look-Up Table
This is what you see in the viewfinder with the s709 MLUT enabled for the HDMI/SDI output and also enabled for the viewfinder (VF). The waveform is measuring the levels of the s709 look-up table.
1) Recording format
2) Selected look-up table
3) Waveform being measured
4) Zebra 2 Level (in this example 78%)
5) Zebra 1 level (in this example set to 61%)
Once in the grading suite James was impressed by the amount of texture and detail that could be found in the deepest shadows and the brightest highlights within his S-log3 material.


Hybrid Autofocus
The FX6 includes Sony’s fast hybrid auto focus, which has Auto Focus phase-detection pixels across almost the entire sensor (89% of the sensor). But if you want you can use two smaller AF areas: “Zone,” which covers around 1/3 of the frame, and the much smaller “Flexible Spot.”

The position of both the “Zone” and “Flexible Spot” areas can be controlled using the camera’s touch screen. On many occasions, James made use of the flexible spot autofocus—simply touching the touchscreen to move the focus point from one object to another, for example the shot of the two deer at 1:40.
The rate at which the autofocus changes and how responsive the AF is can also be tailored to suit your individual needs.
Both James and I suggest that anyone using the FX6 should spend some time learning how all the AF controls work. As an example, for his wildlife work where he doesn’t know what the animals are going to do, James prefers to use the AF set to its most responsive setting with a fast AF transition speed. He needs the autofocus to react quickly, without hesitation or delay, and to change rapidly, as you only get one chance to get the shot before the animal is gone. For most of the shooting I do, shots that are stage managed or more controlled, I prefer a slower and more gentle auto focus action. So, for those types of shots, I will typically use “locked on” with a slower transition speed. Understanding what works for you in different types of shots is a new skill to learn, but once mastered you will find the autofocus to be incredibly useful.
Morning Sun Silhouettes
Many of the shots in the film involved very early starts so James could shoot the animals silhouetted against the low morning sun or the setting sun late in the day. In autumn and winter, shooting into the sun can be challenging, and you only have a very short period of time where the light is at its best. The FX6 has a built-in full-frame variable ND filter which allowed James to quickly adjust to the rapidly changing light while maintaining a wide aperture for that cinematic look during his dawn and dusk shots. In addition to the variable ND filter, the FX6 also has the ability to shoot at a second, higher base ISO (ISO 12800 when shooting S-Log3) that is only fractionally noisier than the regular low base ISO. This allowed James to extend the time he could usefully shoot at both ends of the day when the light levels would be too low for many other cameras.
During our chat, James told me how when working for clients such as National Geographic there is now much more insistence on the use of large-sensor cameras with high-quality lenses. This, combined with greater care and attention to the framing and composition of shots, is bringing a more high-end, cine-style look to documentary and wildlife productions. James felt that one important thing about the FX6 was that its ease of use, combined with the accuracy and reliability of the autofocus, meant that he was able to pay more attention to how he composed his shots, and as a result he was shooting better-looking footage, not just technically but also esthetically.
I’d like to thank James for sharing his shooting experience with me. If you want to know more about James and what he does, please take a look here.


