Do it yourself: shooting great content for YouTube
Film-maker, author and educator Den Lennie knows what looks good. In partnership with Sony, he’s been meeting creative communities in Asia and Australia in a series of YouTube Space pop-up events. Here are Den’s tips for using cameras like the FS5 II to achieve more cinematic results — without a big crew to back you up.

Focus on your story
With YouTube—and other platforms like Instagram that are becoming more video-driven—staying relevant to your online audience is all about creating lots of engaging content, fast. You might be posting new stories every week, or every day. And you could be on the move a lot of the time, shooting content in all kinds of conditions, like in a dark café, on a plane or train, or in the back of a taxi. So you have to think about a camera and a workflow that supports that creative process and lets you focus on telling your story. The good news today is that technological bar has never been lower. It’s cheaper, quicker, and easier than ever to grab great-looking content and share it with your online audience.

Don't underestimate your audience
Social platforms like YouTube are a fantastic medium that’s open to everyone — even people who haven’t come up through a conventional film-making background. YouTube can seem quite “informal” compared with TV broadcasting. But don’t underestimate your online audience. Viewers have got thousands of channels to choose between, and they can be very sophisticated in their tastes. They expect your videos to be in focus and well-lit, with decent audio. So don’t let them down — or get ready to lose traffic, fast. Luckily, today’s kit makes the job much easier, even when you’re working alone.

Let the camera do the work
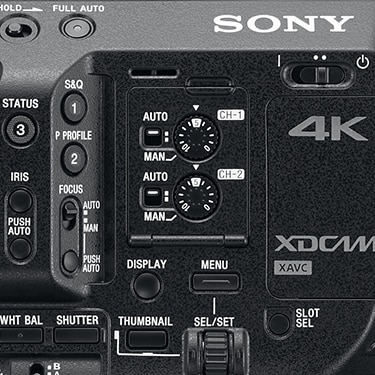
The great thing about today’s kit is that it helps you achieve cinematic results without having to carry too much gear. I always advise new film-makers to capture as much as they can in-camera, rather than wasting time trying to fix things afterwards in the edit. And the wonderful thing about cameras like the FS5 II is that they pretty much do the hard work for you with features like auto exposure and auto iris. Until quite recently, most DSLR cameras weren’t that great at autofocusing with video — but with the FS5 II, you get that facility right off the bat. That makes it much easier to get near-cinema quality results, even when you don’t have the luxury of a big crew. A serious camcorder like the FS5 II also offers extra creative features that professional cinematographers use all the time. A great example is the camera’s built-in variable ND (Neutral Density) filter. This cuts the amount of light falling on the sensor, without impairing image quality. That might seem strange — why would you want less light, rather than more? Well, it’s very handy for creating a shallower depth of field, forcing you to open the iris even on bright days when you’d normally have to stop down. Similarly, dialing in the ND filter lets you use a slower shutter speed to get a particular look in a scene.

It's all in the detail
A camera like the FS5 II gives you the instant advantage of a big sensor that grabs lots of light and detail. It’s a totally different game from shooting with your smartphone, which has a really tiny image sensor. And that’s great for capturing lots of detail, even in low illumination when you’re not carrying lights, or don’t have time to set them up. I get asked why anybody would want to shoot in 4K for content that’s going to end up viewed in low resolution on YouTube. Even when you’re watching in HD, or SD, 4K content somehow just looks better. I love cameras like the FS5 because they capture and retain loads of information and emotion that you can keep right through the edit. So if I’m shooting in XAVC, I’m getting lots of 4K detail, color and dynamic range in a relatively small file that’s easy to handle — even in tough conditions that challenge other cameras. And there’s another big workflow benefit for solo shooters. You can put that 4K footage onto a 1080 timeline and “pan-and-scan” to crop the shot. That can help to ensure your head’s framed just right in those handheld selfies.
Make the grade
YouTubers aren’t always familiar with the idea of grading, which is really just another name for color correction. Essentially, this is about matching the color, hue and saturation of different shots taken in different conditions to make them look the same. Equally, grading can be used to create a particular aesthetic mood to suit your narrative. I often favor shooting in S-log, as it lets me capture lots of dynamic range, color, and detail without losing dark highlights or shadow details. And then, when I’m grading my footage in the edit suite, I’ve got a huge amount of control over achieving exactly the look I want. To begin with, grading can seem daunting but many content creators freely share settings for specific looks as LUTs (Look Up Tables) which can be imported into editing software like Adobe Premiere, DaVinci Resolve, Final Cut Pro X, and more. It’s easy to apply these LUTs to your footage, switching between different looks and then tweaking as necessary. Sony provides its own collection of LUTs for download here >

Sound tells your story
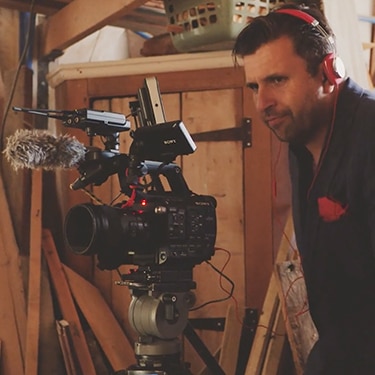
Any professional cinematographer will say that sound is a big part of telling your story. So many YouTube videos have terrible audio — and they don’t need to! Spend a couple of hundred dollars on a decent wireless microphone: you’ll never regret it. Pro camcorders like the FS5 II include a Multi-Interface (MI) shoe that provides power and signal connections for Sony’s excellent wireless mic systems. As a bonus, the FS5 II also features dual XLR input connectors: they’re much more rugged than the fussy little microphone jack on consumer camcorders — if they have one at all. As an extra refinement, a pro camera like the FS5 II lets you record on separate audio channels. For example, one channel is often used to record you (or your subject) speaking, picked up by the wireless mic. Then the other channel’s used to capture background sounds—often referred to as “atmos”—via the camera’s own built-in mic. That way, you’ve got far more control over balancing levels, ensuring everyone and everything’s heard clearly. Then, in post-production, there are lots of handy tools and plugins out there to sweeten your sound. With a few clicks, you can remove hiss, equalize different frequencies, or add extra punch to dialogue. It’s easy, and it doesn’t have to be expensive.
Let there be light
One of the best investments you can make is some lighting to create a sense of depth and dimension in the scene. You’ll need a direct “key light” to illuminate your subject, plus a more diffused “fill light”—maybe bounced off a wall or reflector—to soften harsh shadows. These are complemented by a third “hair light” that gives some warmth and presence from behind. You don’t have to spend a fortune; there are plenty of cheap LED sets to be found on eBay. You can even cheat and use your iPhone or torch as an additional light source. But whatever you pick, it will make all the difference.

